


Ultralight Backpacking Guide! Part Three
Calling all gear nerds! This post is for you

Welcome back to the Ultralight Backpacking Guide series! If you love gear talk, you’re in the right place. This week we are discussing several different schools of thought when choosing what to take into the backcountry. I noted a while ago that backpacking is very subjective and that no two hikers have the same setup. This is where that statement really comes into play. Because there are SO MANY hiking equipment options created by separate companies all promoting their products as the best ones out there, it gets confusing. The topic of gear is as gray as it gets. I hope that this post clears up any uncertainty and hopefully makes your purchases a little easier when deciding which items will most likely work best for you on your next trip.
Internal frame vs frameless packs
As someone who has experience working in an outdoor gear shop, most of the options being sold from these stores (including REI) typically cater to the traditional backpacker the most. I can’t tell you how many Boy Scout father/son duos I’ve helped find what they need for certain trips and they always gravitate more towards the heavy 75-liter internal frame pack. And it makes sense why! Their motto is literally always “be prepared” for anything, so they end up taking a lot of hefty gear with them. Not only that but these packs are built to carry large loads and they do an amazing job at making 50 pounds ride comfortably. However, if you are wanting to dabble more into going ultralight, the name of the game is efficiency.
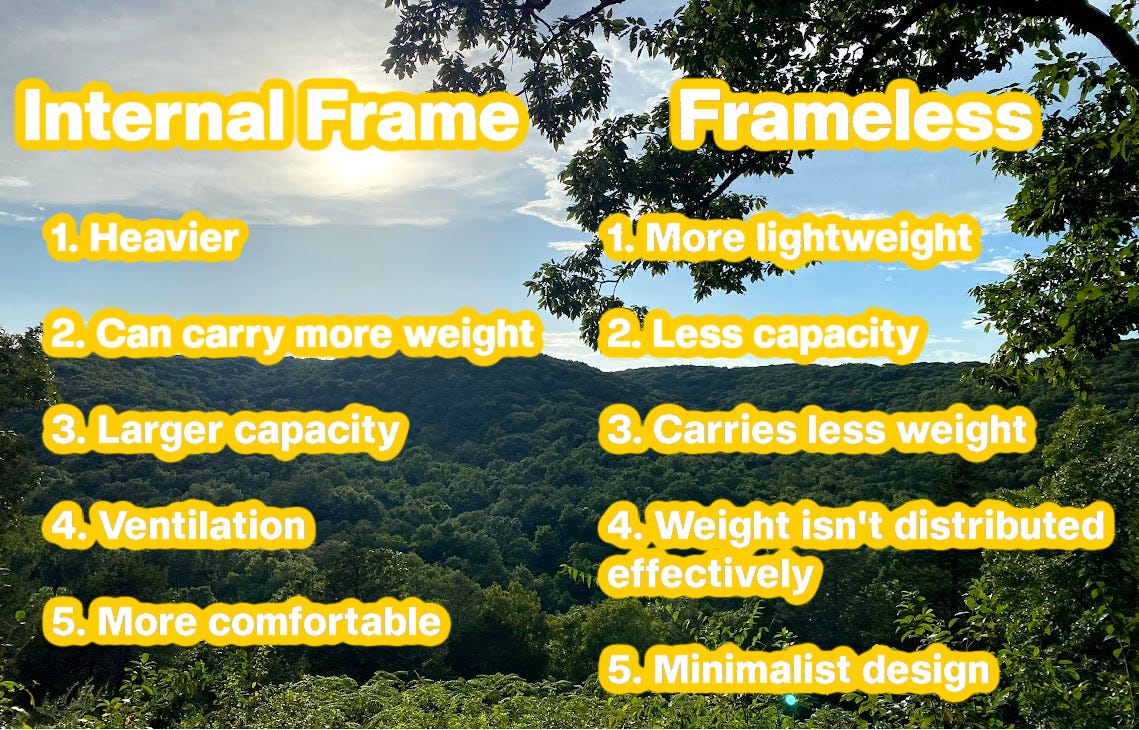
With that being said, no matter how long your trip is, you simply don’t need a large pack when you’re focused on being lightweight and carrying as little as possible. For typical backpacking trips, I tend to stay in the 40-50 liter range and often prefer a frameless pack over an internal frame. With internal framed packs, as their name suggests, a rigid steel or aluminum frame is hidden in the pack's backside and that is what keeps the pack supported. They are structured to distribute weight evenly and generally can handle more pounds inside the body without being too unbearable. Frameless packs do not have a framed structure and by nature cannot withstand a heavy load. While these packs take a little more adjusting to get the correct fit, they are lighter and make a good option for those who already don’t carry a lot.

With my ultralight internal frame packs, at 2lbs 10oz, the REI Flash 55 is a great option. I have also tried the Osprey Eja 48 and have had successful trips with this pack as well. However, if you want to go in a more frameless direction, you might have to branch out from your local gear shops and look into cottage companies like Gossamer Gear. I have their G4-20 (less than two pounds) and literally fell in love with it as soon as I strapped it on. I also have heard that their Gorilla 50 with its removable internal frame feature is pretty rad as well. Keep in mind though that with each of these packs, their comfort load is around 20-25lbs with 30lbs being the max weight. Therefore, having a dialed-in ultralight setup is essential.
Down vs synthetic insulation
When discussing sleeping bags, or just insulation in general, there are two main options on the market and either option is seasonally dependent. Compressibility is key when choosing a sleeping bag and if you want the best of the best, down is your guy. Sleeping bags or jackets with down insulation are made from the undercoat of either goose or duck or a combination of both. It’s definitely the warmest option and can squeeze down much smaller than you think it will to fit comfortably inside your pack. The major downside to down is the fact that if it gets wet in any way, it won’t keep you warm until it dries back out. That’s where synthetic insulation comes in to save the day! Synthetic insulation made up of polyester fibers was invented to mimic the qualities of down, yet still retain warmth even when wet. The most common type of synthetic insulation is PrimaLoft, but some outdoor companies have made their own like North Face’s ThermoBall or Arc’teryx’s Coreloft for their jackets.
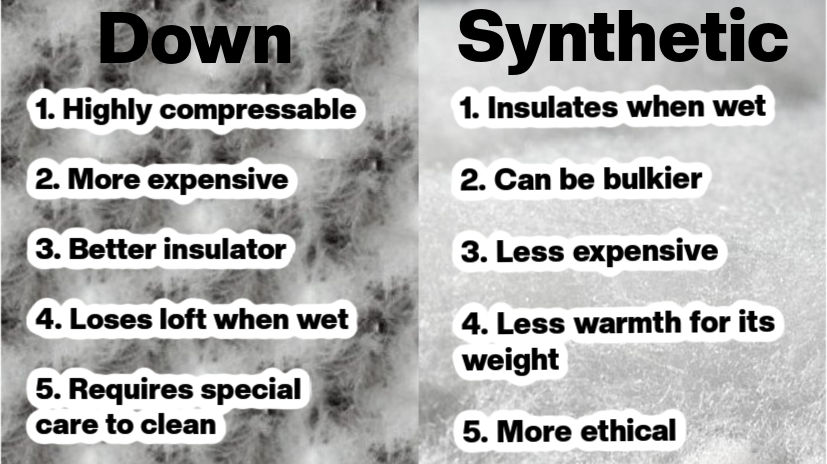
Being a vegan, I prefer synthetic insulation over down from an ethical standpoint. Even though down is the premier choice, I still wrestle with this fact every winter as I think about what to take with me on backpacking trips when the weather dips into frigid territory. When considering sleeping bags, in spring, summer, and fall I tend to use a standard lightweight synthetic 55-degree bag for hot, humid weather or my Sea to Summit Traverse 25-degree bag when the temperature is in the 40s and 50s. Because I sleep extremely cold, anything lower than 40 degrees or so is when I typically need something a little heftier. I still have not found a warm enough synthetic sleeping bag that meets my specific weight requirements yet, but I’m still looking!
Before I went vegan, I invested in a 10-degree down Western Mountaineering bag. It’s hard to still not love that bag as it only weighs a little over one pound. You can’t beat that. Either way, if ultralight is your top priority, down will probably be the way to go as it provides the optimal “warmth to weight” ratio and also compresses so nicely. Synthetic bags are great, but the warmer you need them, the more the bag’s weight will climb. If you’re in a situation like mine, I am hoping one day outdoor technology will get even better and make synthetic materials just as attractive and sexy as down.
Tents vs tarps
I’m just going to go ahead and say it, I will probably always be a tent person. I like having my own enclosed space when backpacking. It makes me feel safer, gives me peace of mind, and at the end of a very long day of walking myself into insanity, it provides the illusion that I’m anywhere but in the great outdoors. I collapse into my tent and instantly I’m in my own world. In my own 7 X 3 foot bubble where I can rest easy knowing that I am protected from whatever nature throws at me. Even so, there is validity to using tarps. Obviously, tarps are the lightest weight choice with only a ceiling of fabric between you and the sky. You could even get creative and take a small pack blanket with you as a ground cloth and boom! There’s your home for the night.
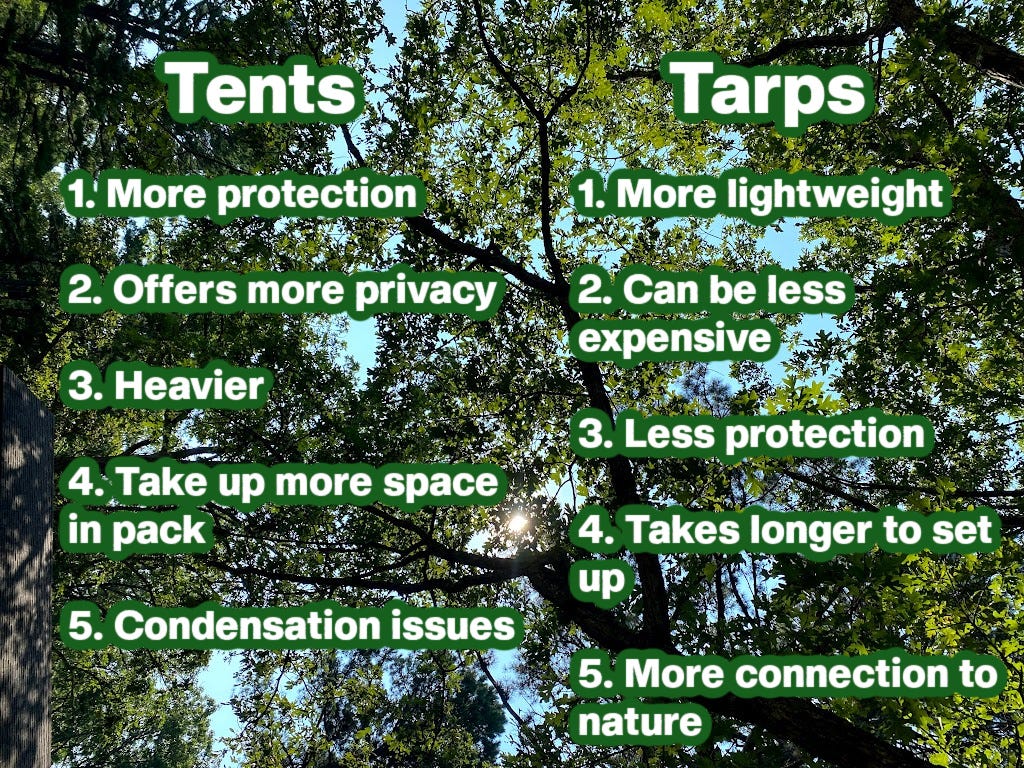
I was first introduced to tarps during my time as a wilderness therapy guide. The tarps used during the program were huge and clunky to accommodate the bodies of both staff and kids, but the principle of the matter was enough to make me rethink my own sleep system. At some point, I want to really experiment and try this method out. I think using tarps is a great choice for those who backpack in areas without the possibility of snow, high winds, or a chance of heavy rainfall. I say this because having four walls surrounding you during extremely gnarly conditions is probably the smartest thing to do. However, that doesn’t necessarily mean someone wouldn’t be safe using a tarp when a storm rolls in. I was thoroughly surprised by how dry I stayed at night and protected I was from the elements while guiding in North Carolina. Yet, I don’t think sleeping in a tarp on top of Mt. Washington would be a good idea (especially since that is illegal).

As for the tent argument, there are a plethora of lightweight options out there ranging from trekking pole designs to freestanding styles to semi-freestanding and beyond. As someone who typically doesn’t utilize trekking poles, I gravitate more towards freestanding and aim for something that is around two pounds or less for a one-person tent. The NEMO Hornet 1 satisfies this demand quite well with its aluminum poles, 10-denier ripstop nylon fabric body, and polyurethane rainfly. However, there are even better options out there that are a little pricier. Zpacks’ Plex Solo and Duplex options are made from Dyneema® Composite Fabric which are some of the most lightweight materials on the market. It’s ultimately up to you to decide which tents fit your weight and budget requirements. I would highly recommend researching like crazy and if you can see these tents in person or borrow from a friend for a night, definitely do so.
Other gear considerations
This post is getting way too long so I’m going to bullet point other gear options to consider for your ultralight journey!
Sleeping pads: Closed-cell foam pads like a Therm-a-Rest Z Lite Sol are the lightest weight options and are easily customizable to make them even lighter (use scissors to trim off the edges for a better fit). Yet, inflatable sleeping pads like the Sea-to-Summit Ultralight Air Mat are a great choice if you want something more comfortable. Keep in mind though that for cooler weather you will need a sleeping pad that is insulated and has a higher R-value. However, the warmer the pad, the heavier it is. The Big Agnes Insulated Air Core Ultra is a good option for colder adventures.
Water supplies: Always, always, always bring a filter with you. My go-to is Sawyer’s Mini or Squeeze filter style, either of which will last a very long time if taken care of properly. As for bottles, a standard Smartwater bottle you can get at any gas station is a great lightweight option. Collapsable water containers are good too and some should be able to hook on to a Sawyer filter if they have a normal water bottle style screw lid.
First Aid/repair/personal care supplies: I recommend saving your money and not buying a pre-made first aid or repair kit. Half the stuff packed in those kits are items you will most likely never use. I typically only pack a few assorted-sized band-aids, a small roll of medical tape, a few strips of duck tape, six or so tablets of Advil or Ibuprofen, one or two small packets of antibiotic ointment, and a small bundle of Paracord. As for personal care items, travel-sized anything is your best friend.
Clothes: We will cover what clothes to take depending on the season in the fourth and final post in the series!
The Berryman meltdown
This story is a tale of sheer stupidity. However, in hindsight, it was an honest mistake that I definitely learned the hard way. There’s a fairly large loop trail in Missouri called the Berryman Trail. It attracts backpackers, mountain bikers, trail runners, and horseback riders of all kinds. At 27 miles, half of this loop shares its dirt path with the Ozark Trail and offers nothing more than a gentle, meandering walk through the woods. I’ve done the loop three times now and the third time was probably one of the worst experiences I’ve ever had on a trial. I was attempting to fastpack the loop and broke the trip into two days. This was my first time trying to fastpack and I had a decent game plan, except the trail had other intentions.
It was a hot summer day during a typical Midwest heat advisory when I began my trip. Mistake number one. The first day wasn’t too bad and I managed to travel 16 miles until I reached a small campground on the side of the trail for the night. Since I was running, my fully loaded pack couldn’t weigh more than 10 pounds, or else it was way too uncomfortable. So for the sake of being as ultralight as possible, I decided not to bring a sleeping bag or sleeping pad and opted just for a thin sleeping bag liner. As for my shelter, I brought a confining bug bivy. Mistake number two and three. My reasoning was I would be too hot if I brought a sleeping bag and with my attempts to be as weight conscious as possible, a bivy seemed reasonable to at least keep me away from the summer mosquitoes. In theory, this all sounds great, but in reality, that could not be farther from the truth.

Despite the heat advisory, the weather cooled at night and since I wasn’t physically moving anymore, my body temperature plummeted as well. And I sleep really cold anyway, so in other words, I was not having a good time and stayed awake all night. I didn’t have a sleeping pad either, so I was even more chilly and uncomfortable. If you're reading this and shaking your head, believe me, I am too. After the horrible night, I packed up camp and trekked on. Although, tragedy struck again when my water filter malfunctioned five miles from the trailhead and I had to finish the trail in a heat stroke-induced state.
The moral of the story: just because you try to go ultralight doesn't mean it’s always going to be peachy keen the entire time. With backpacking comes the unexpected and despite our best efforts to outsmart Mother Nature, we won’t always win. On your journey to ultralight stardom, anticipate failure and mistakes. And most of all, do not do what I did.
If you made it to the end of this painfully long, gear-obsessed post, I appreciate your determination. Stayed tuned for next week’s last installment of the Ultralight Backpacking Guide as we talk about clothes and cover tips on how to be mentally tough while carrying less.
Thanks for reading and see you out on the trail!